Use Pendrive as Ram to Get Ultra Speed
Everybody love speed. Here is an amazing trick to use pen drive as ram. It can really increase you computer speed. Memory of your pen drive/sub is used as virtual memory. When computer's internal RAM is full, it uses pen drive as RAM to store data. Thus your system will be much much faster. It will be very helpful for playing Games, Video editing..etc. To configure USB/Pen drive as RAM is very easy. Here are steps to increase ram using pen drive/USB Flash drive in both XP and Windows 7

Everybody love speed. Here is an amazing trick to use pen drive as ram. It can really increase you computer speed. Memory of your pen drive/sub is used as virtual memory. When computer's internal RAM is full, it uses pen drive as RAM to store data. Thus your system will be much much faster. It will be very helpful for playing Games, Video editing..etc. To configure USB/Pen drive as RAM is very easy. Here are steps to increase ram using pen drive/USB Flash drive in both XP and Windows 7
How to Use pen drive as ram in XP
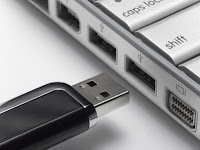
- Connect your Pen drive ( Minimum of 1 GB).
- Wait till the system detects your pen drive.
- Right click on My Computer and select the properties.
- Goto advanced-->>custom size "Check the value of space available".
- Enter the same in the Initial and Max Columns.
- Restart your system and feel the difference.
How to Use pen drive as ram in Windows 7
- Connect your Pen drive ( Minimum of 1 GB).
- Open My Computer
- Right-click on the icon pen driveive and select Properties.
- In the Removable Disk Properties go to ReadyBoost tab.
- Select the radio button that says Dedicate this device to ReadyBoost. (or use the option below in the image)
7. Clilck Ok all Windows.
8. Restart your system and feel the difference


